2024年7月

在使用Python的matplotlib库绘制图形时,我们常常需要控制坐标轴的单位长度。

当x和y轴的比例不同,图形可能会被拉伸或者压缩,从而失真。本文将介绍如何通过设置坐标轴的纵横比例,

使得x和y轴的单位长度相等。

Matplotlib是一个功能强大的Python绘图库,可用于创建各种类型的静态、动态和交互式图形。

它提供了许多选项和配置,以便用户可以自定义他们的绘图。其中一个重要的功能就是控制坐标轴的纵横比例。

在Matplotlib中,我们可以使用axis()函数来设置坐标轴的范围和纵横比例。

具体来说,axis()函数有四个参数:[xmin, xmax, ymin, ymax]。这些参数控制了x和y轴的范围。

如果我们只提供前两个参数,则Matplotlib将使用默认值。

接下来,我们可以使用aspect参数来控制坐标轴的纵横比例。该aspect参数可以是一个浮点数或字符串(如"equal")。

如果我们将aspect参数设置为"equal",则x和y轴的单位长度将相等。

否则,我们可以计算出x和y轴的比例,并将其作为浮点数提供给aspect参数。

下面,我们通过一个示例来演示如何使用Matplotlib设置坐标轴的纵横比例。

首先,我们需要导入Matplotlib库,并创建一个Figure对象和一个Axes对象。

然后,我们使用plot()函数生成一些随机数据并将其绘制在图形上。

import matplotlib.pyplot as pltimport numpy as np# 创建Figure对象和Axes对象fig, ax = plt.subplots()# 生成随机数据x = np.arange(0, 10)y = np.random.rand(10)# 绘制线条ax.plot(x, y)

现在,我们将使用axis()方法控制坐标轴的范围和纵横比例。

在这里,我们将指定x轴的范围为[0, 10],y轴的范围为[0, 1],并将aspect参数设置为"equal":

# 设置坐标轴范围和aspect参数ax.axis([0, 10, 0, 1])

ax.set_aspect("equal")

最后,我们通过show()方法显示图形:
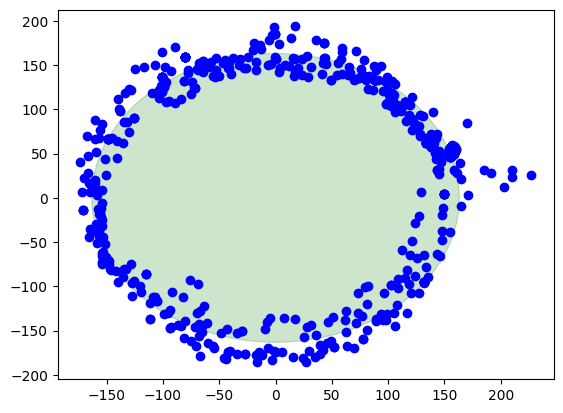
plt.show()

现在,我们已经成功地使用Matplotlib设置了坐标轴的纵横比例,使得x和y轴的单位长度相等。我们可以看到图形看起来更加正常,因为没有被拉伸或压缩

总结起来,我们可以通过设置坐标轴的纵横比例使得x和y轴的单位长度相等。在Matplotlib中,

我们可以使用axis()函数来设置坐标轴的范围和纵横比例,以及使用set_aspect()方法来设置纵横比例。

如果我们将aspect参数设置为"equal",则x和y轴的单位长度将相等。否则,我们可以计算出x和y轴的比例,

并将其作为浮点数提供给aspect参数。


https://github.com/risherlock/Magnetometer-Calibration


https://www.mirkosertic.de/blog/2023/01/magnetometer-calibration-ellipsoid/


How to calibrate a 2D magnetometer with ellipsoid fitting

Step 1: Load uncalibrated magnetometer data as CSV

The data was recorded by logging data from the magnetometer.

Take care! This calibration process should be done while all systems of your robot or solution are running, so in a real life environment. This will make sure we take all hard iron influences into consideration. Place the robot in the middle of a room and let your robot turn to the left and to the right for a minute, and record the data.

In[1]:

import mathimport pandas as pdimport numpy as npimport matplotlib.pyplot as pltfrom matplotlib.patches import Ellipserawdata = pd.read_csv('mag_out.csv')

Step 2: Visualize the data to see what is going on

The easiest way is to plot the data on the x/y plane as a scatter plot. Every point represents a measurement of the magnetic field. We should see a perfect circle here, centered at (0,0).

Due due hard iron effects, we do not see a circle, but an ellipse. There are also outliers related to sensor noise. It also seems not to be centered at (0,0) at all.

Goal of the calibration procedure is to find a way to transform the measurements back into a circle.

In[2]:

plt.scatter(rawdata["x"], rawdata["y"], label='Data Points', color='b')plt.show()

Out[2]:

ellipsoid output 4 0

Step 3: Calculate the ellipsoid

Ellipsoid fitting tries to find the best fitting ellipsoid in the data. During this process, outliers are mostly eliminated and sensor noise reduced. As the result, we get the center point of the ellipsoid, the length of its axes and also its orientation.

In[3]:

xcol = rawdata["x"]ycol = rawdata["y"]xmin = xcol.min()xmax = xcol.max()ymin = ycol.min()ymax = ycol.max()width = xmax - xminheight = ymax - yminxyratio = width / height# Code taken from https://scipython.com/blog/direct-linear-least-squares-fitting-of-an-ellipse/def fit_ellipse(x, y):    """    Fit the coefficients a,b,c,d,e,f, representing an ellipse described by    the formula F(x,y) = ax^2 + bxy + cy^2 + dx + ey + f = 0 to the provided    arrays of data points x=[x1, x2, ..., xn] and y=[y1, y2, ..., yn].    Based on the algorithm of Halir and Flusser, "Numerically stable direct    least squares fitting of ellipses'.    """    D1 = np.vstack([x**2, x*y, y**2]).T    D2 = np.vstack([x, y, np.ones(len(x))]).T    S1 = D1.T @ D1    S2 = D1.T @ D2    S3 = D2.T @ D2    T = -np.linalg.inv(S3) @ S2.T    M = S1 + S2 @ T    C = np.array(((0, 0, 2), (0, -1, 0), (2, 0, 0)), dtype=float)    M = np.linalg.inv(C) @ M    eigval, eigvec = np.linalg.eig(M)    con = 4 * eigvec[0]* eigvec[2] - eigvec[1]**2    ak = eigvec[:, np.nonzero(con > 0)[0]]    return np.concatenate((ak, T @ ak)).ravel()def cart_to_pol(coeffs):    """    Convert the cartesian conic coefficients, (a, b, c, d, e, f), to the    ellipse parameters, where F(x, y) = ax^2 + bxy + cy^2 + dx + ey + f = 0.    The returned parameters are x0, y0, ap, bp, e, phi, where (x0, y0) is the    ellipse centre; (ap, bp) are the semi-major and semi-minor axes,    respectively; e is the eccentricity; and phi is the rotation of the semi-    major axis from the x-axis.    """    # We use the formulas from https://mathworld.wolfram.com/Ellipse.html    # which assumes a cartesian form ax^2 + 2bxy + cy^2 + 2dx + 2fy + g = 0.    # Therefore, rename and scale b, d and f appropriately.    a = coeffs[0]    b = coeffs[1] / 2    c = coeffs[2]    d = coeffs[3] / 2    f = coeffs[4] / 2    g = coeffs[5]    den = b**2 - a*c    if den > 0:        raise ValueError('coeffs do not represent an ellipse: b^2 - 4ac must'                         ' be negative!')    # The location of the ellipse centre.    x0, y0 = (c*d - b*f) / den, (a*f - b*d) / den    num = 2 * (a*f**2 + c*d**2 + g*b**2 - 2*b*d*f - a*c*g)    fac = np.sqrt((a - c)**2 + 4*b**2)    # The semi-major and semi-minor axis lengths (these are not sorted).    ap = np.sqrt(num / den / (fac - a - c))    bp = np.sqrt(num / den / (-fac - a - c))    # Sort the semi-major and semi-minor axis lengths but keep track of    # the original relative magnitudes of width and height.    width_gt_height = True    if ap < bp:        width_gt_height = False        ap, bp = bp, ap    # The eccentricity.    r = (bp/ap)**2    if r > 1:        r = 1/r    e = np.sqrt(1 - r)    # The angle of anticlockwise rotation of the major-axis from x-axis.    if b == 0:        phi = 0 if a < c else np.pi/2    else:        phi = np.arctan((2.*b) / (a - c)) / 2        if a > c:            phi += np.pi/2    if not width_gt_height:        # Ensure that phi is the angle to rotate to the semi-major axis.        phi += np.pi/2    phi = phi % np.pi    return x0, y0, ap, bp, e, phicoeffs = fit_ellipse(xcol, ycol)x0, y0, ap, bp, e, phi = cart_to_pol(coeffs)rat = ap / bp[rat, width, height, x0, y0, ap, bp, e, math.degrees(phi)]

Out[3]:

[1.0796413094280661,400.20000000000005,353.28000000000003,-1233.400221573585,-470.075066520626,163.20561364076153,151.16651448546256,0.3769501500025899,4.9892937074437285]

In[4]:

ellipse = Ellipse((x0, y0), ap * 2, bp * 2, color='r', angle=math.degrees(phi), fill=False)fig, ax = plt.subplots()ax.add_patch(ellipse)ax.scatter(xcol, ycol, label='Data Points', color='b')plt.plot([x0 - math.cos(phi) * bp, x0 + math.cos(phi) * bp], [y0  - math.sin(phi) * ap, y0 + math.sin(phi) * ap], color='r', linestyle='-', linewidth=1)plt.plot([x0 - math.cos(phi + math.pi / 2) * bp, x0 + math.cos(phi + math.pi / 2) * bp], [y0 - math.sin(phi + math.pi / 2) * ap, y0 + math.sin(phi + math.pi / 2) * ap], color='r', linestyle='-', linewidth=1)plt.show()

Out[4]:

ellipsoid output 7 0

Step 4: Apply offsets and rotation to data

We apply the found hard iron offsets, scale factors and rotation compensations to the data points to make it the best circle we can.

In[5]:

rot = round(phi / (math.pi / 2.0))rotation = -(phi - rot * math.pi / 2.0)def correctdata(row):    x = row["x"] - x0    y = row["y"] - y0    return [x * np.cos(rotation) - y * np.sin(rotation),            (x * np.sin(rotation) + y * np.cos(rotation)) * rat]res = rawdata.apply(correctdata, axis=1, result_type='expand')rawdata["xcorrected"] = res[0]rawdata["ycorrected"] = res[1]math.degrees(phi), math.degrees(rotation)

Out[5]:

(4.9892937074437285, -4.9892937074437285)

Finally, the corrected data

Here we are, this is the result when the calibration is applied. The center of the circle is at (0,0). There is also a green circle in the background showing the layout of a perfect circle to see the difference.

In[6]:

circle = plt.Circle((0, 0), ap, color='g', alpha=0.2)fig, ax = plt.subplots()ax.add_patch(circle)ax.scatter(rawdata["xcorrected"], rawdata["ycorrected"], label='Data Points', color='b')plt.show()

Out[6]:

ellipsoid output 11 0

Summary

Pros

  • Sensor noise and outliers are well handled

  • Directional and rotational offsets are corrected

  • Works with a small set of data points to start calibration

Cons

  • Computationally intensive

  • Harder math

  • Harder to debug


一、计算特征值与特征向量的方法

  • BDCSVD
  • JacobiSVD
  • SelfAdjointEigenSolver
  • ComplexEigenSolver
  • EigenSolver
  • GeneralizedSelfAdjointEigenSolver


二、方法说明

    2.1 BDCSVD
           功能为:Bidiagonal Divide and Conquer SVD,双对角线分治SVD


   2.2 JacobiSVD

            功能为:Two-sided Jacobi SVD decomposition of a rectangular matrix, 长方形矩阵的双侧 Jacobi SVD 分解。


    2.3 SelfAdjointEigenSolver

            功能为:Computes eigenvalues and eigenvectors of selfadjoint matrices. 计算自伴矩阵的特征值与特征矢量

    2.4 ComplexEigenSolver

             功能为:Computes eigenvalues and eigenvectors of general complex matrices. 计算一般复数矩阵的特征值与特征向量,这在特征值模块中定义。


     2.5 EigenSolver

            功能为:Computes eigenvalues and eigenvectors of general matrices. 计算一般矩阵的特征值与特征向量,这在特征值模块中定义。        
      

    2.6 GeneralizedSelfAdjointEigenSolver

           功能为:Computes eigenvalues and eigenvectors of the generalized selfadjoint eigen problem. 计算广义自伴特征问题的特征值与特征向量。


De = HelperDrawEllipsoid;
De.plotCalibrated(A,b,expMFS, mag,corrected_mag,'Auto');


解决方法:
     将Matlab自带的磁力计文件加入当前的matlab工作路径。